
In order for PeakIdentify to label peaks correctly it has to figure out the direction the camera is currently pointing, or, in the case of a loaded photograph, the direction the camera was pointing at the time the picture was taken. Additionally, PeakIdentify has to figure out how wide the field of view (FOV) is (for the current live camera view) or was (for a loaded photograph). The way PeakIdentify figures out the needed information depends on the current view mode:
In the live camera view the FOV is computed based on information provided by the device's camera manufacturer.
Whether in live camera view or in photograph view, PeakIdentify may fail to find the correct view direction and/or FOV. In live camera view this happens (most frequently) if the magnetic field sensors in the device are out of calibration or if the device is close to an external source of magnetic field. In the case of a loaded photograph view the failure to find the correct view direction and/or FOV may be due to one or more of these reasons: there is no EXIF information attached to the photograph; the photograph has been substantially cropped so that the sensor information and/or focal length EXIF tags do not match the photograph FOV; the camera sensor is not in the PeakIdentify database of sensors and there is no 35mm-equivalent EXIF tag; the automatic direction finding algorithm fails to find the mountain profile in the photograph because of the presence of clouds or other objects in the profile. Whatever the cause of failure, PeakIdentify allows the user to manually adjust the view direction and/or the FOV to match that in the live view or photograph view as described below.
PeakIdentify uses your device's magnetic sensors to figure out where you are pointing your camera. For this to work, the magnetic sensors need to be calibrated before PeakIdentify is started. Please consult your device's documentation on how to calibrate the sensors. The first time PeakIdentify detects that the magnetic sensors are out of calibration it will alert you. However, if the sensors go out of calibration afterwards, PeakIdentify will not issue the alert again (until it is restarted).
However, even if the magnetic field sensors are calibrated, stray magnetic fields will cause PeakIdentify to compute the wrong direction of the camera and the peak labels will not be shown at the correct locations. You can manually adjust PeakIdentify's view direction by placing your finger on the screen and sliding it left or right until PeakIdentify's terrain model matches that of the camera view or the loaded photo, as demonstrated below:
PeakIdentify uses the information provided by your device's manufacturer to compute the camera's field of view (FOV). It uses this information in computing the peak label positions as well as the displayed terrain. When viewing a loaded photo PeakIdentify uses the EXIF information embedded in the image to compute the field of view. However, the EXIF information may not be complete, or even present in the photo. In that case you may have to adjust the field of view manually by placing two fingers on the screen and sliding them apart to decrease the FOV, or sliding them together to increase the FOV, as illustrated below.
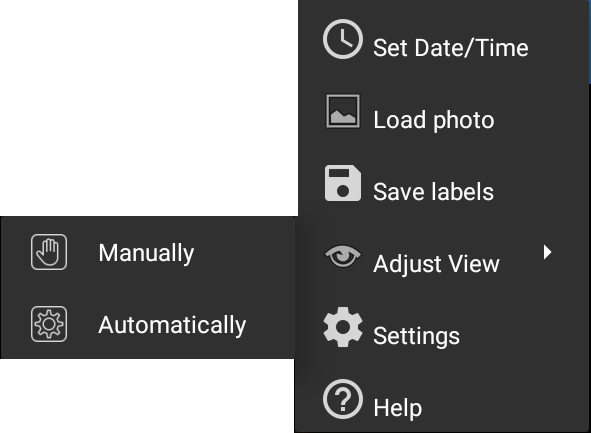
In addition to being able to adjust the view by sliding or pinching the screen, as described above, PeakIdentify allows you finer control of the FOV, its direction, altitude, and tilt through the use of the widget shown below. The widget is accessible by selecting the "Adjust view" menu item, and then selecting the "Manually" submenu item.
When manual View adjustment is selected a widget that allows modifying each parameter of the view will be shown:
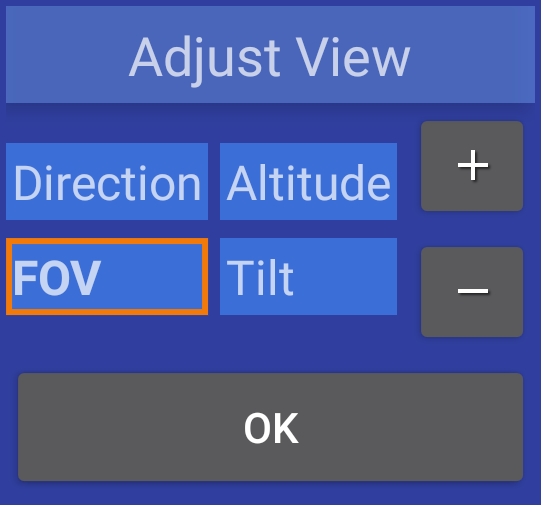
The widget can be moved around the screen by touching
and holding the title bar (Adjust View) and dragging
it to a convenient place. Each of the fields can be
adjusted by first selecting it (by tapping it name)
and then increasing or decreasing its value by tapping
the  or
or
 , respectively. A
single tap on these buttons will adjust the value by a
small amount. If the buttons are long-pressed
(touching and holding the button) the values will be
incremented/decremented continuously and by larger
amounts.
, respectively. A
single tap on these buttons will adjust the value by a
small amount. If the buttons are long-pressed
(touching and holding the button) the values will be
incremented/decremented continuously and by larger
amounts.
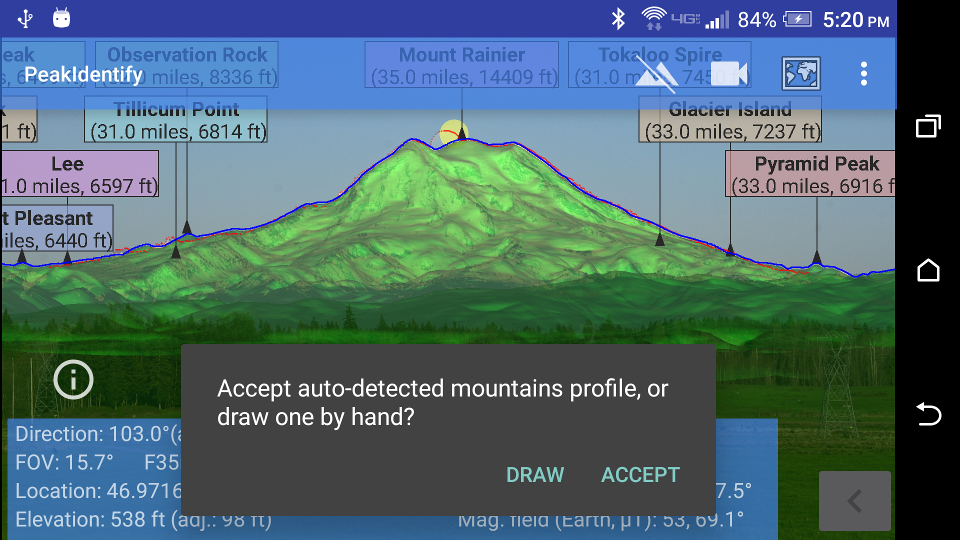
When a photograph is loaded for viewing, PeakIdentify tries to automatically find the direction the camera was pointing by (1) finding the mountain profile in the photograph, (2) finding the mountain profile in the 3D terrain model (from the DEM files) surrounding the current location, and (3) finding the direction that best matches the two. (Note that for this to have a chance of working, the DEM files for the photograph location must have been previously downloaded, or their download enabled via (Settings->3D Terrain)). After the photograph is successfully loaded into view PeakIdentify detects the mountain edges (profile) in the photograph and draws the edges in red. After that PeakIdentify will construct the edges in the 360-degrees surrounding the current position, in segments each of width equal to the field-of-view width computed for the current photograph. For each such segment PeakIdentify will draw the profile with a blue line. The number of such segments, and the length of time of time it takes to construct them, depends on the FOV. The smaller the FOV (due to zooming in, or to using a lens with a long focal length) the larger the number of segments and the longer the total time spend in constructing the full 360-degree profile. The process should not take more than 5-10 seconds, though. After the 360-degree profile is constructed, finding the direction that best matches the one in the photograph will take a fraction of a second. After the best direction is found a dialog appears asking if the auto-detected mountain profile in the photograph is acceptable, or if it needs to be changed by drawing. The photograph below shows an example in which the profile is detected correctly.
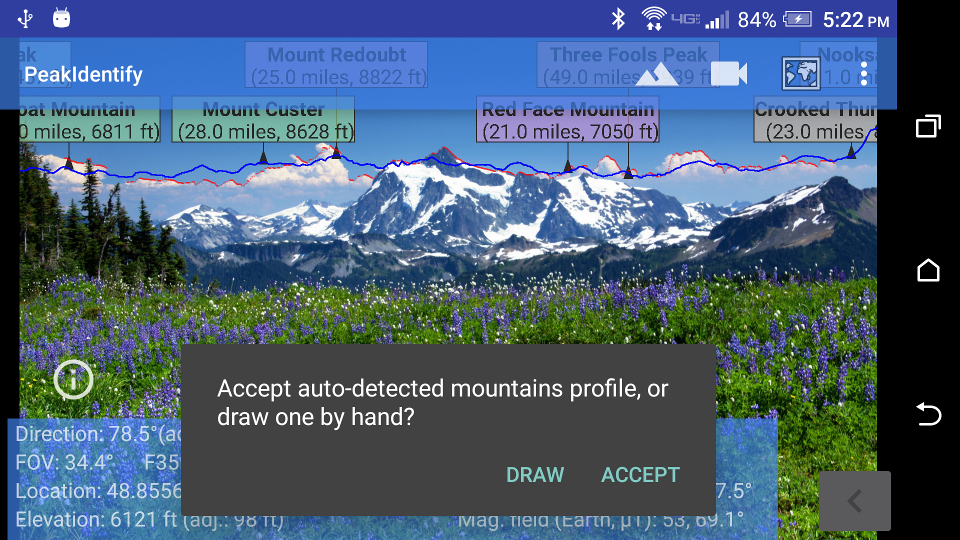
If the photograph has clouds and/or foreground objects (such as trees, or people) that appear above the mountain profile, PeakIdentify may include the edges from those in the mountain profile and hence fail to compute the correct view direction. In that case you can press "DRAW" to help PeakIdentify with constructing the profile. An example photograph is shown below together with sample subsequent corrections to the profile.
When you touch "DRAW" in the confirmation dialog new controls will appear at the bottom of the screen that will allow you to adjust the profile which appears as yellow dots:
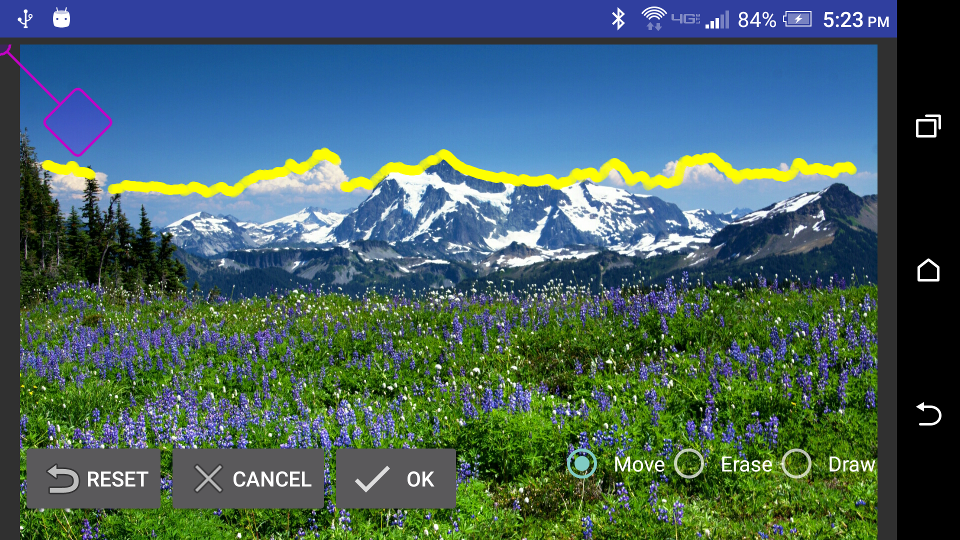
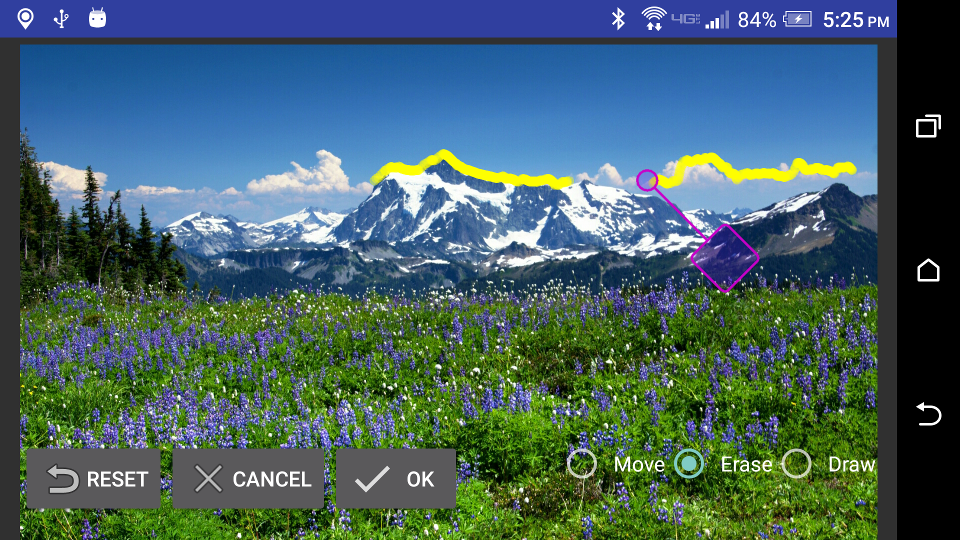
Profile points can be deleted or drawn using a tool (shown in purple). (The reason for providing such a tool, instead of simply using fingers to directly draw/erase the points, is that for devices with smaller screens, a finger may obscure the mountain profile that one is attempting to draw.) To move the tool select the "Move" radio button at the bottom; touching the screen at any point after that will place the square part of the tool under the touched part. You can drag the tool to place the circle over the points you want to erase or to draw. To erase points already drawn select the "Erase" radio button and move the tool so that the open circle covers the points to be erase, as shown in the sample picture below.
If the square part of the tool gets too close to the
edge of the screen, you can rotate it by pressing the
rotation button ( ) until the square
part falls comfortably in the screen.
) until the square
part falls comfortably in the screen.
To erase all the points in the current profile, click the "Reset" button.
To add points to the mountain profile, first select the "Move" radio button, then move the tool so that the open circle is on top of the mountain edge you want to draw over, as shown in the sample picture below,
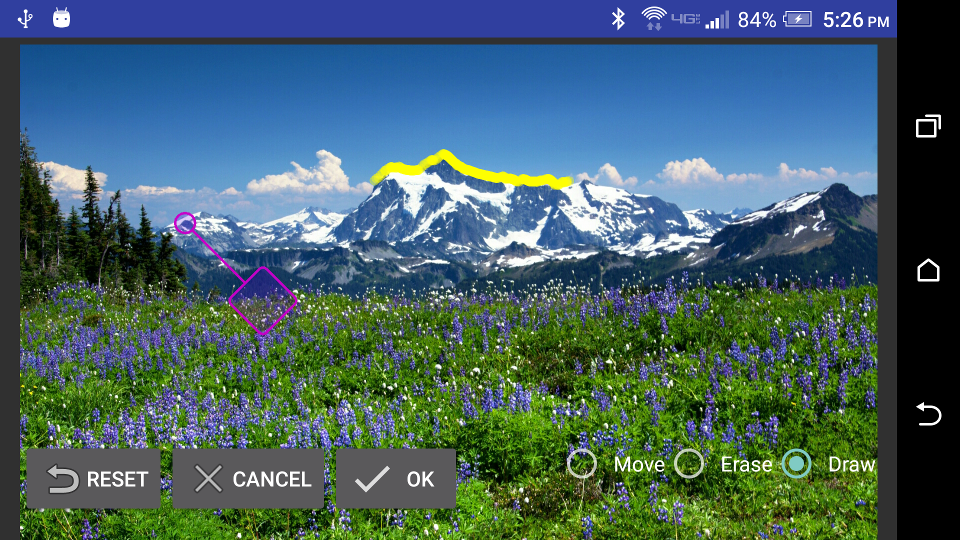
then select the "Draw" radio button and move the drawing/erasing tool so that the open circle "paints" over the mountain edge profile, as shown in the picture below.
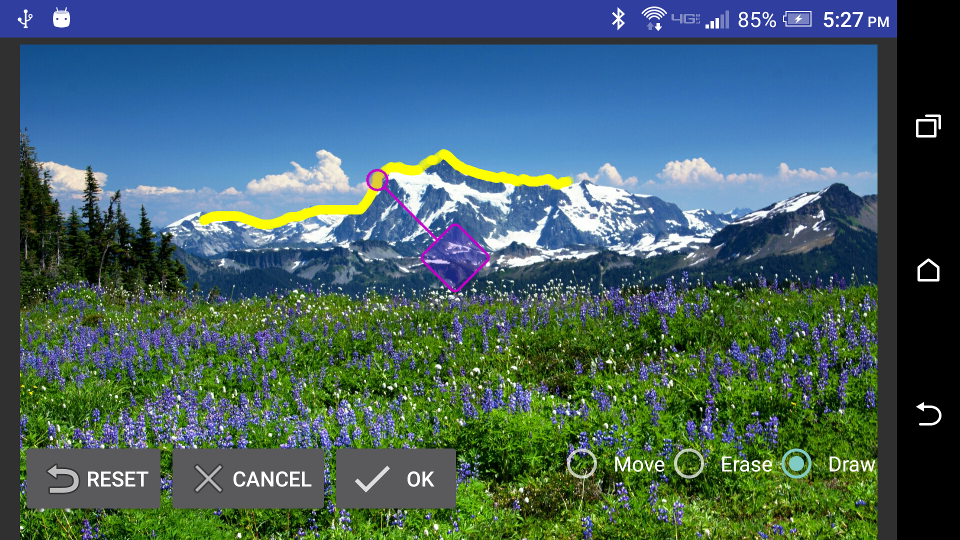
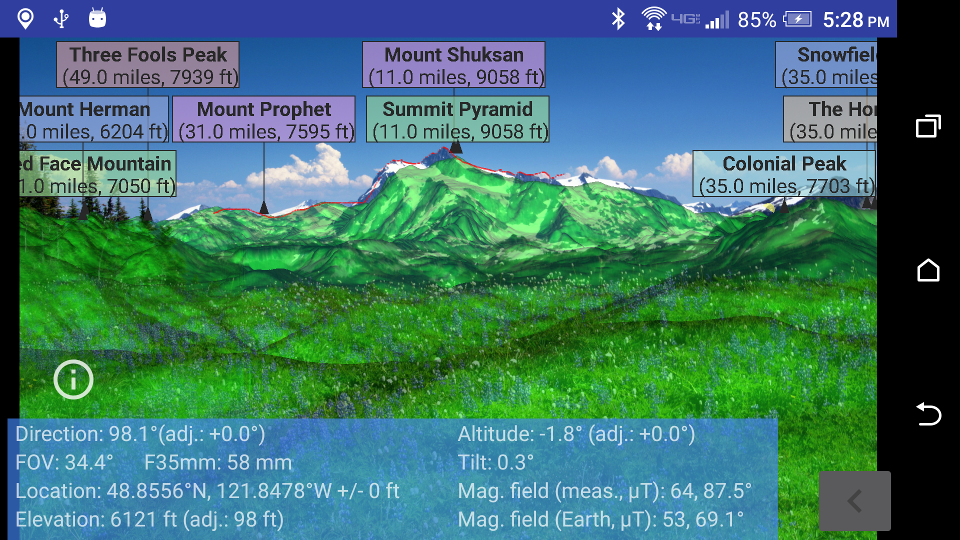
When done with drawing the correct profile, touch the "OK" button at the bottom of the screen. PeakIdentify will then find the view direction that best matches the drawn profile, as illustrated in the sample photograph below.
Note that drawn profile need not cover the full width of the FOV. It may be sufficient to provide enough peaks and trough points to distinguish that view direction from others.
To abandon profile drawing (and the subsequent view direction matching), click the "Cancel" button.